HOOKE ROAD BXG.8283 Rear Bumper

Introduction
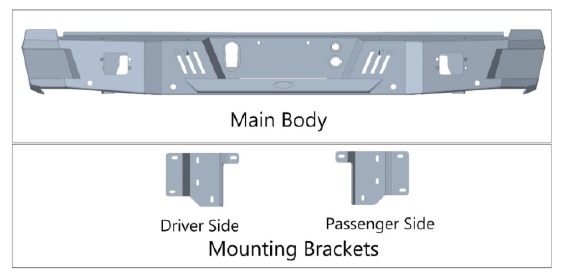
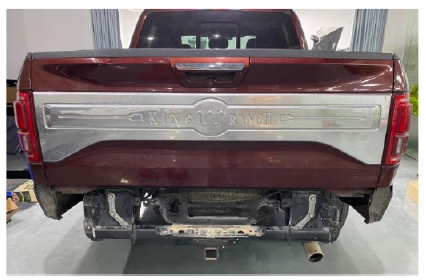
The Hooke Road BXG.8283 is a robust aftermarket rear bumper made for truck owners and off-road enthusiasts looking for increased utility and protection. This bumper, which is made of high-strength steel, gives your car strong design and exceptional impact resistance. It is especially made for [insert appropriate car models, such as the Toyota Tacoma or Jeep Wrangler JL/JT]. and features pre-drilled holes that make it simple to install add-ons like LED lights, spare tire carriers, and tow hooks.
Specifications
- Part Number: BXG.8283
- Contents:
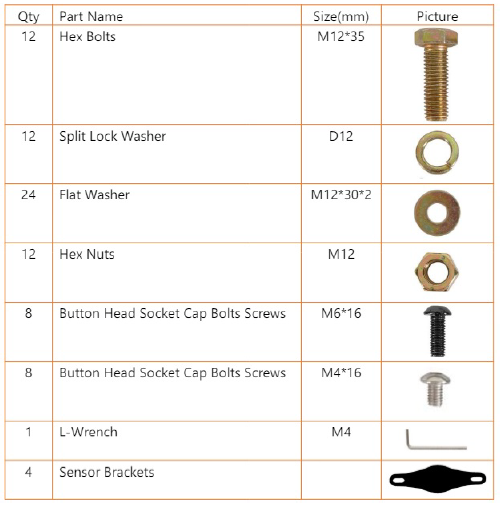
- 12 Hex Bolts Size(mm) M12*35
- 12 Split Lock Washer D12
- 24 Flat Washer M12*30*2
- 12 Hex Nuts M12
- 8 Button Head Socket Cap Bolts Screws M6*16
- 8 Button Head Socket Cap Bolts Screws M4*16
- 1 L-Wrench M4
- 4 Sensor Brackets
Tools required
- Drive Socket Ratchet Wrench
- 10mm, 19mm Wrench
- 19mm Shallow Socket
- 4mm Hex Bit Socket
Contents
TOOLS
Drive Socket Ratchet Wrench; b. 10mm, 19mm Wrench; c. 19mm Shallow Socket; d. 4mm Hex Bit Socket
Installation Time
About 1 hour, 1-2 people may be needed. Installation time may differ according to your mechanical skill level. (PLEASE VERIFY ALL PARTS ARE PRESENT AND READ INSTRUCTIONS CAREFULLY BEFORE STARTING INSTALLATION!) To view the electronic version (BXG.8283), please scan the QR code.

Installation Instructions
With the factory tow hook:
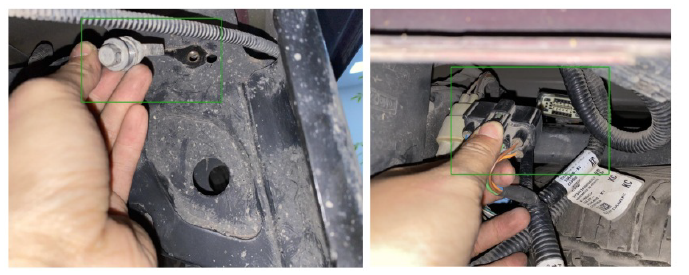
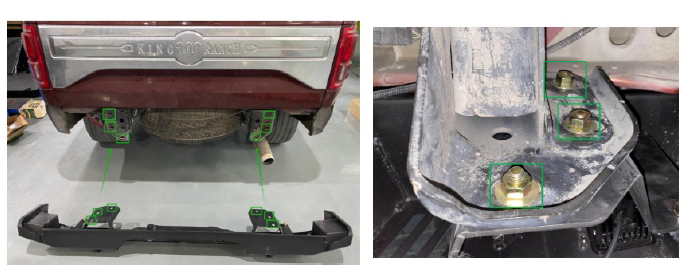
- Remove the original car rear bumper radar harness using a 10mm wrench.
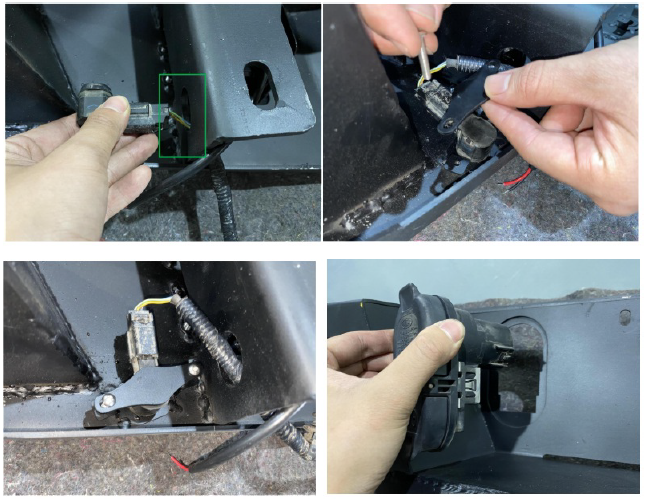
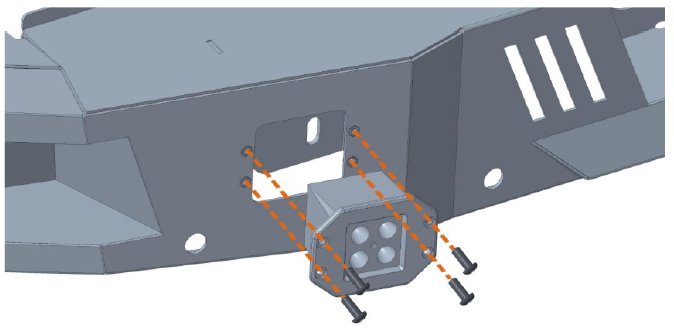
- Insert the plug of the original car radar harness into the corresponding radar socket and secure it with M4*16 screws.
- Secure the radar to the rear bumper using sensor brackets.
- Fasten the bumper using M12*35 screws with washers and nuts.
Without the factory tow hook:
- Remove the original car rear bumper.
- Mount the brackets on the bumper using M12*35 screws.
- Secure the bumper using M12*35 screws with washers and nuts.
- Install the provided square lights into the bumper using M6*16black screws.
Attention:
- The product parts in this instruction may differ slightly from the actual product contents but generally does not affect the installation of the product.
- Please feel free to contact your distributor if you have any kind of question about your purchase.
Installation time
About 1 hour, 1-2 people may be needed. Installation time may differ according to your mechanical skill level.
(PLEASE VERIFY ALL PARTS ARE PRESENT AND READ INSTRUCTIONS CAREFULLY BEFORE STARTING INSTALLATION!)
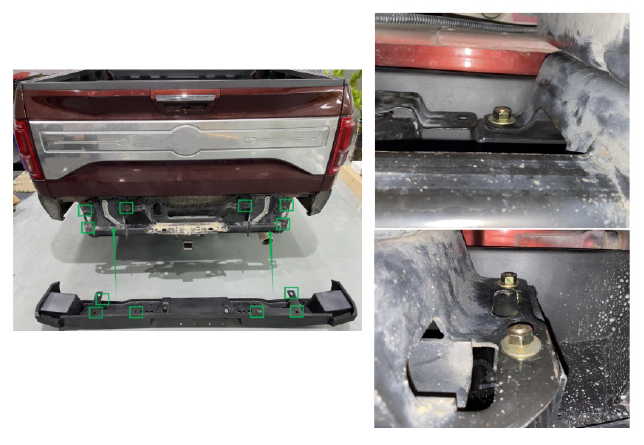
- Step 1: First, remove the original car rear bumper radar harness. Use a 10mm wrench to unscrew the screws behind the original car bracket, and then unplug the harness connector.
- Step 2: Insert the plug of the original car radar harness into the corresponding radar socket, secure the radar to the rear bumper using the sensor bracket, and fasten it with M4*16 screws to prevent shaking or damage during driving. Put the trailer connector into the bumper. We provide instructions for two installation methods, please choose one method to install according to the situation of your car. With the factory tow hook
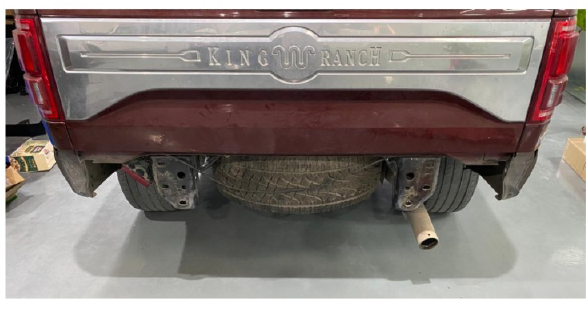
- Step 3: Before installing our product, ensure that the vehicle is parked in a safe and level location, and remove the original car rear bumper.
- Step 4: It is recommended to install the bumper with assistance. Lift the bumper, align it with the original vehicle mounting holes, and secure it using M12*35 screws with washers and nuts. Adjust the gap from the vehicle and tighten the screws.
Without the factory tow hook
- Step 5: Before installing our product, ensure that the vehicle is parked in a safe and level location, and remove the original car rear bumper.
- Step 6: Next, the mounting brackets need to be mounted on the bumper. Use M12*35 screws to assemble them. Repeat the same procedure on the other side.
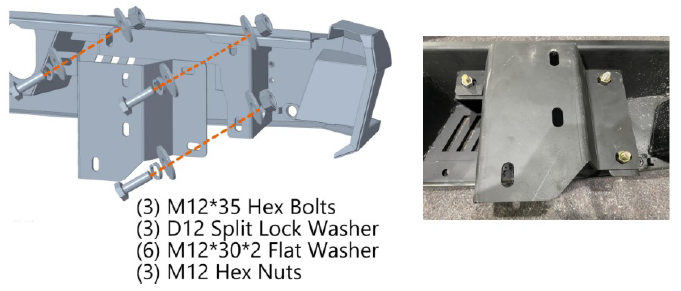
- Step 7: It is recommended to install the bumper with assistance. Lift the bumper, align it with the original vehicle mounting holes, and secure it using M12*35 screws with washers and nuts. Adjust the gap from the vehicle and tighten the screws.
- Step 8: Finally, install the provided square lights into the bumper. Use M6*16 black screws for the installation.
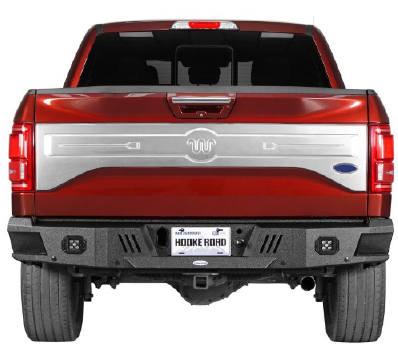
- Step 9:
The installation is complete. We hope you enjoy a wonderful off-road life with this quality Hooke Road product!
Attention:
- The product parts in this instruction may differ slightly from the actual product contents but generally does not affect the installation of the product.
- Please feel free to contact your distributor if you have any kind of question about your purchase.
Hooke Road
- Google Hooke Road to find your parts.
- Feel Free To Share Your Vehicle @HookeRoad4x4
- With The Hashtag #hookeroad If You’d Like
HOOKE ROAD BXG.8283 Rear Bumpers Installation Guide
FAQ
Is installation hardware included?
Yes, it includes brackets and grade-8 bolts for the majority of applications.
Can I use my factory backup camera with it?
Camera relocation brackets are included with the majority of models; check before buying.
Can I later add an extra tire carrier?
Yes, it works with the swing-out tire carrier kits from Hooke Road (separately sold).
Can factory mud flaps be used with it?
Please check the model-specific fitting as some trimming could be necessary.
How long is the warranty?
Limited lifetime guarantee against flaws in production.