Pioneer DEH-P7200HD RECEIVER AUTORADIO RADIO CD
Introduction
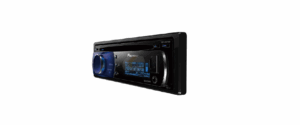
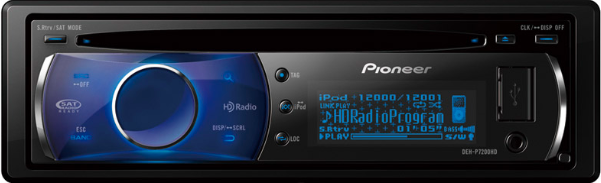
High-performance CD/MP3/WMA receiver with Bluetooth® and HD Radio TM, the PIONEER DEH-P7200HD is made for hands-free convenience and excellent music quality. This receiver provides your car, truck, or SUV with clear, strong audio thanks to its MOSFET 50Wx4 amplification, a display that can be customized, and sophisticated audio settings.
Specification
- 50W x 4 (peak) and 22W x 4 (RMS) audio output MOSFET amplifier Bluetooth v3.0 (A2DP audio streaming & hands-free calling)
- HD RadioTMYes (free online broadcasts featuring information about the song and artist)
- Support for USBPlayback of MP3/WMA/AAC, 32GB FAT32 maximum CDCD, CD-R/RW (compatible with MP3/WMA)
- EQ & Sound Six preset sound options and a 13-band graphic equalizer
- Preamp Results Three RCAs (4V) (Front/Rear/Subwoofer)
- Customizable Display 512-color LCD controlled by a dimmer
- 178 x 50 x 160 mm (7″ x 2″ x 6.3″).
Features
- Wirelessly take calls and stream music with Bluetooth® connectivity.
- HD Radio™: A subscription-free digital radio that is crystal clear.
- Play music from flash drives with USB Direct Control (iPhone/iPod compatible).
- 13-Band Graphic EQ: Adjust the treble, mids, and bass
- MOSFET 50Wx4 Amp: a powerful sound without distortion.
- The steering wheel control is ready, but an adapter is needed.
- The 512 display colors can be adjusted to fit your dash thanks to variable color illumination.
Connecting the unit
WARNING
- Use speakers over 50 W (output value) and between 4 W to 8 W (impedance value). Do not use 1 W to 3 W speakers for this unit.
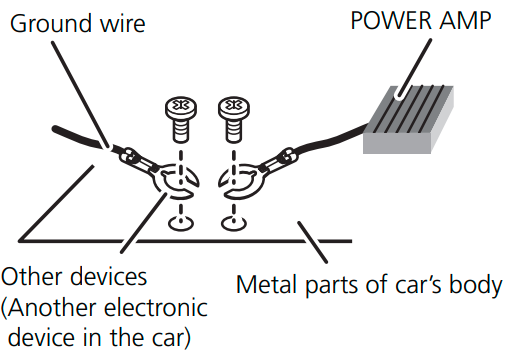
- The black cable is ground. When installing this unit or power amp (sold separately), make sure to connect the ground wire first. Ensure that the ground wire is properly connected to the metal parts of the car’s body. The ground wire of the power amp and the one of this unit or any other device must be connected to the car separately with different screws. If the screw for the ground wire loosens or falls out, it could result in fire, generation of smoke, or malfunction.
Important
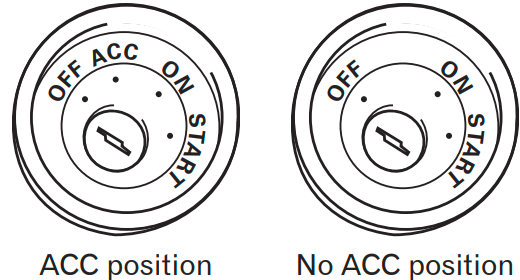
- When this unit is installed in a vehicle without an ACC (accessory) position on the ignition switch, a red cable must be wired to the terminal that can detect the operation of the ignition key. Otherwise, battery drain may result.
- Use this unit with a 12-volt battery and negative grounding only. Failure to do so may result in a fire or malfunction.
- To prevent short-circuit, overheating, or malfunction, be sure to follow the directions below.
- Disconnect the negative terminal of the battery before installation.
- Secure the wiring with cable clamps or adhesive tape. To protect the wiring, wrap adhesive tape around them where they lie against metal parts.
- Place all cables away from moving parts, such as gear shift and seat rails.
- Place all cables away from hot places, such as near the heater outlet.
- Do not connect the yellow cable to the battery by passing it through the hole to the engine compartment.
- Cover any disconnected cable connectors with insulating tape.
- Do not shorten any cables.
- Never cut the insulation of the power cable of this unit to share the power with other equipment. The current capacity of the cable is
- limited.
- Use a fuse of the rating prescribed.
- Never wire the speaker negative cable directly to the ground.
- Never band together multiple speaker’s negative cables.
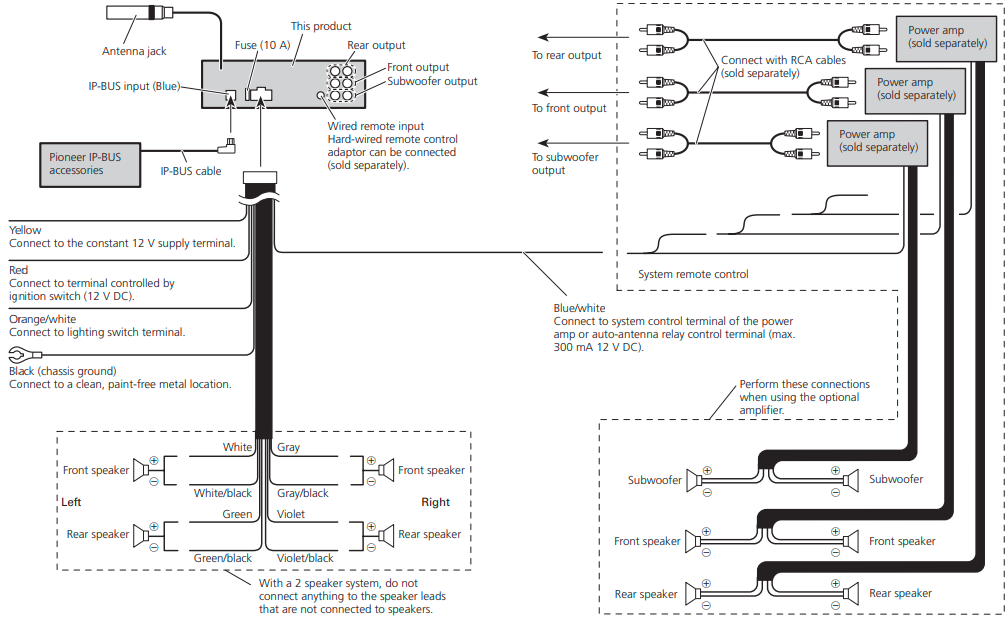
- When this unit is on, control signals are sent through the blue/white cable. Connect this cable to the system remote control of an external power amp or the vehicle’s auto-antenna relay control terminal (max. 300 mA 12 V DC). If the vehicle is equipped with a glass antenna, connect it to the antenna booster power supply terminal.
- Never connect the blue/white cable to the power terminal of an external power amp. Also, never connect it to the power terminal of the auto antenna. Doing so may result in a battery drain or a malfunction.
- IP-BUS connectors are color-coded. Be sure to connect connectors of the same color.
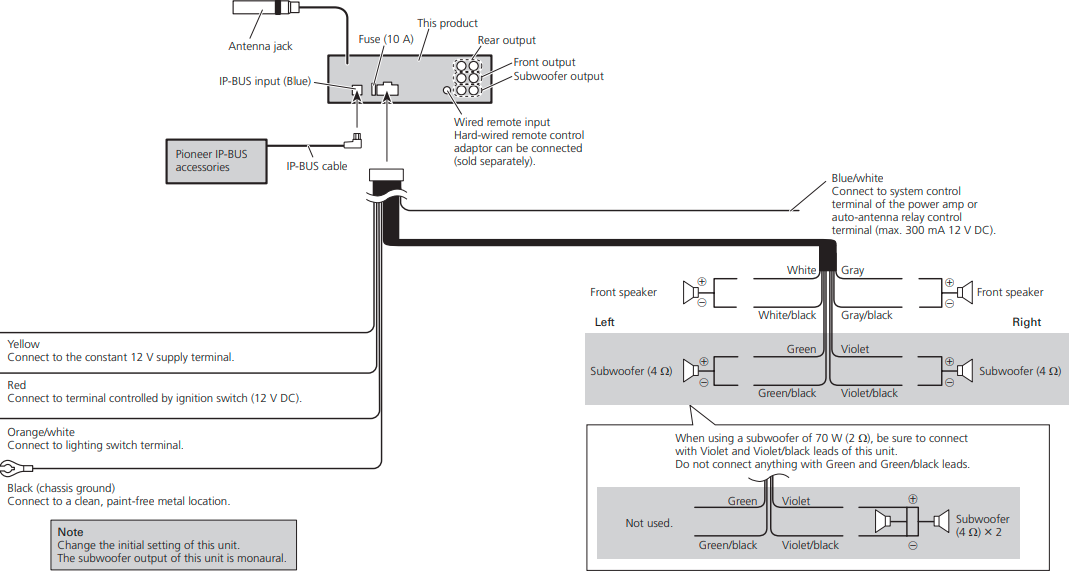
When not connecting a rear speaker leads to a subwoofer
When using a subwoofer without using the optional amplifier
Installation
Note
- Check all connections and systems before final installation.
- Do not use unauthorized parts. The use of unauthorized parts may cause malfunctions.
- Consult with your dealer if installation requires the drilling of holes or other modifications of the vehicle.
- Do not install this unit where:
- it may interfere with the operation of the vehicle.
- it may cause injury to a passenger as a result of a sudden stop.
- The semiconductor laser will be damaged if it overheats. Install this unit away from hot places such as near the heater outlet.
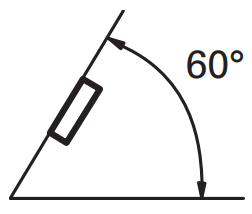
- Optimum performance is obtained when the unit is installed at an angle of less than 60°.
DIN Front/Rear-mount
This unit can be properly installed either from “Front” (conventional DIN Front-mount) or “Rear” (DIN Rear-mount installation, utilizing threaded screw holes at the sides of the unit chassis). For details, refer to the following installation methods.
DIN Front-mount
- Insert the mounting sleeve into the dashboard.
- When installing in a shallow space, use a supplied mounting sleeve. If there is enough space behind the unit, use factory factory-supplied mounting sleeve.
- Secure the mounting sleeve by using a screwdriver to bend the metal tabs (90°) into place.
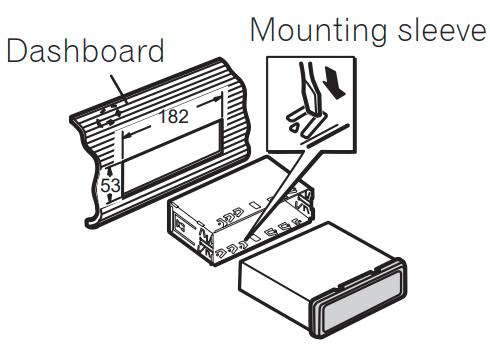
- Install the unit as illustrated.
- Use commercially available parts when installing.
- Make sure that the unit is installed securely in place. Unstable installation may cause this unit to malfunction, such as a sound skip.
- Use commercially available parts when installing.
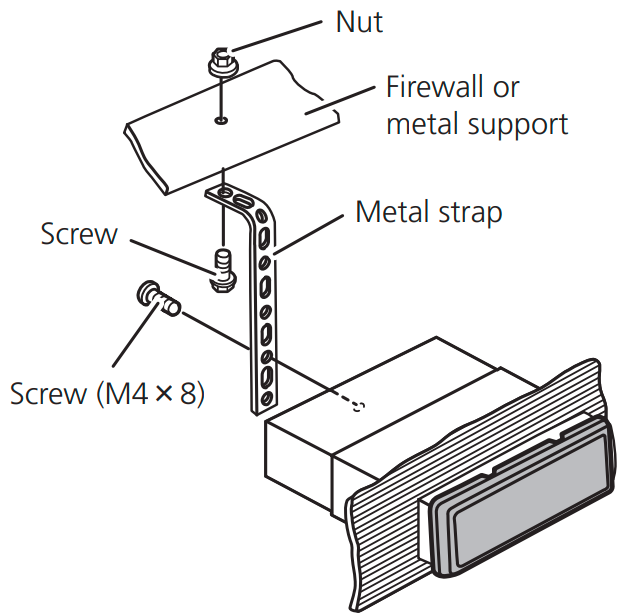
DIN Rear-mount
- Determine the appropriate position where the holes on the bracket and the side of the unit match.
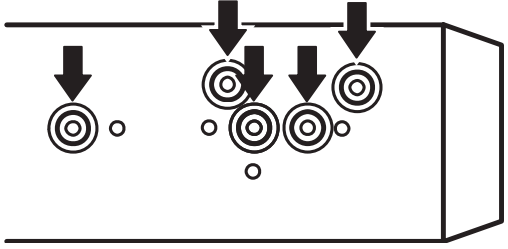
- Tighten two screws on each side.
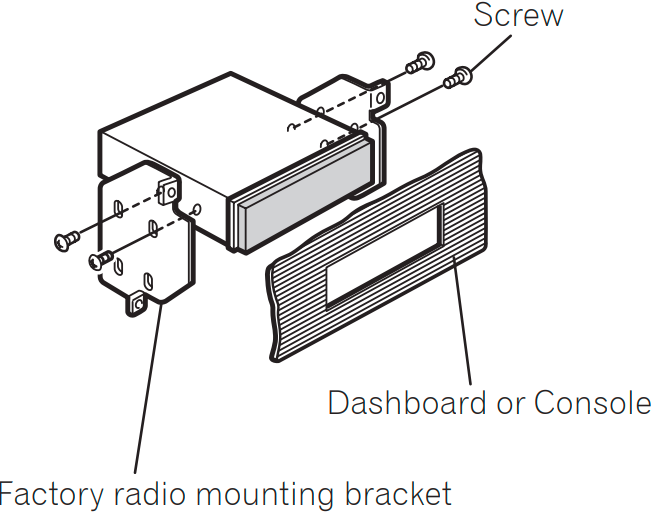
- Use either truss (5 mm × 8 mm) or flush surface (5 mm × 9 mm) screws, depending on the bracket screw holes.
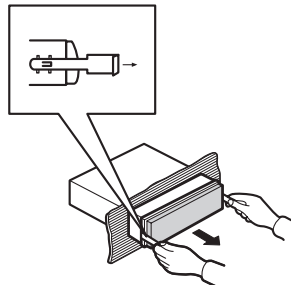
Removing the Unit
- Extend the top and bottom of the trim ring outwards to remove the trim ring. (When reattaching the trim ring, point the side with the groove down.)
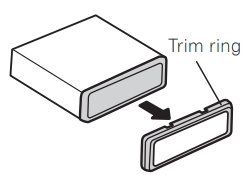
- Releasing the front panel allows easier access to the trim ring.
- Insert the supplied extraction keys into both sides of the unit until they click into place.
- Pull the unit out of the dashboard.
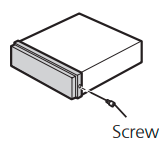
Fastening the front panel
If you do not plan to detach the front panel, the front panel can be fastened with a supplied screw.
Pioneer DEH-P7200HD RECEIVER AUTORADIO RADIO CD User Manual
FAQs
Can I use a USB drive to play music?
Indeed— supports USB (back port) MP3/WMA/AAC files. 32GB FAT32 is the maximum capacity.
Does HD RadioTM come with it?
Yes, without a subscription, with free digital broadcasts. shows the artist and track details.
Are steering-wheel controls compatible with it?
Yes, however an adaptor (such as the PAC RP4.2-CH11) is needed.
How do I reset the unit?
To reset the settings, hold down the “Function” button (see manual p. 15).
Is it possible to connect a subwoofer?
Yes, use the 4V RCA preamp outputs for amplifiers and subs.